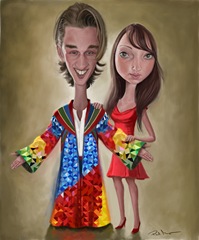
Bowie Faas is from Holland, and is a huge fan of the Dutch version of ‘Joseph and his Amazing Technicolour Dreamcoat’. He commissioned me to do this piece of him and his girlfriend, with him wearing the coat, and I thought it might be fun to share some of the process with you. The following is a quick run-though of the face and hair rendering.
 I wanted to replicate the colours I use when painting with acrylics, so I set up a palette with Cadmium Red, Yellow Ochre, Ultramarine, and Black. The white background is my white for mixing.
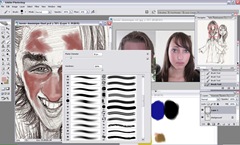 I start a new layer on top of the sketch, then begin blocking with a hard round brush with the hardness at 100%, the opacity set at 100%, and the flow set at 12-13%. Because the flow is reduced, I can merge the colours using the eyedropper tool.
 I tend to use Yellow and Black to make green, I find it gives a more earthy tone. Using the more obvious Blue and Yellow would be fine, but there are going to be a lot of warm (even hot!) colours in the coat, so I have to bear this in mind when choosing the background. Black and white are our cooling colours.
 Detail of the eye. I’m now starting to use a different brush, a ‘spatter’ brush, which is preset #39 in the Photoshop brush menu. Opacity is best kept lower than 50% with this brush, otherwise it is easy to lose control.

Horizontally flipping the canvas gives me a better judgement in terms of aligning or correcting features. From the reference I was given, it seems that Bowie naturally tilts his head forward, so the features have to be aligned with this. There is minor adjustment needed on his left eye.
 I’m using the darker shade of green from his hair to render the eyebrows. To get a smooth fine line with a tapering end, with the #39 brush chosen in the preset menu, select shape dynamics, and make sure the size jitter is set to 0%, and the control to ‘pen pressure’. The opacity can be anywhere between 50 and 100% for this.
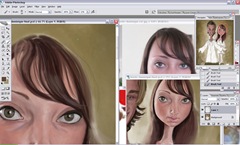 The arrangement of windows on my workspace is important to help me see my progress. The window on the bottom right is a second window of the working file. To open this, go to Window>Arrange>New-Window-For. Having this second window allows me to see a wider view whilst working on a close up version in more detail.
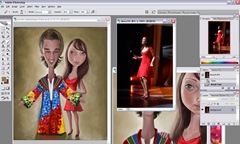 As you can imagine, there was a lot of work involved in rendering the coat, and I could have taken it further given more time. As it is, Bowie and Dominique are very happy with it.
I like to use various approaches to digital and traditional painting, so it would be fun to share those with you too. For the time being, I hope you’ve enjoyed this miniature tutorial, and I look forward to sharing more work with you soon!


Comments
Wow love to see how you 'did us'! we showed it to our friends and the were going crazy, haha. Some of them said:'I want to do that also'. In the beginning we asked different caricaturists, to know what for us was the best. And when we found you Paul we thought it was the best if you made our caricature. Were very happy Paul and were busy looking for good frames! Were so happy! We keep following your Blog and all your pieces. Paul again thanks so much for everything!
Dominique and Bowie
One question I hope you don't mind answering. You mention setting size jitter to 0% - where is the slider for this? I am only using photoshop CS - is this a feature of more recent upgrades?
Anyway - thanks again. Brilliant piece and sounds like you've got two very happy customers!
Thanks for sharing process...really looking forward to the DVD!!!
:)
Two screens, you need two screens !!
Thanks man, your work (and work place below) really inspire me! Great!